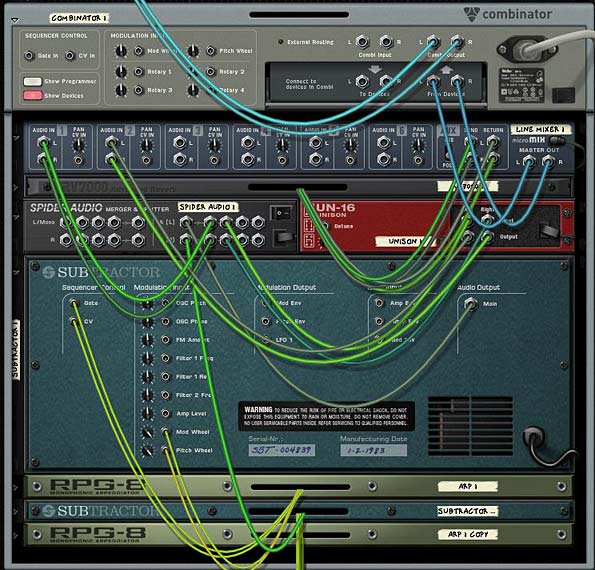
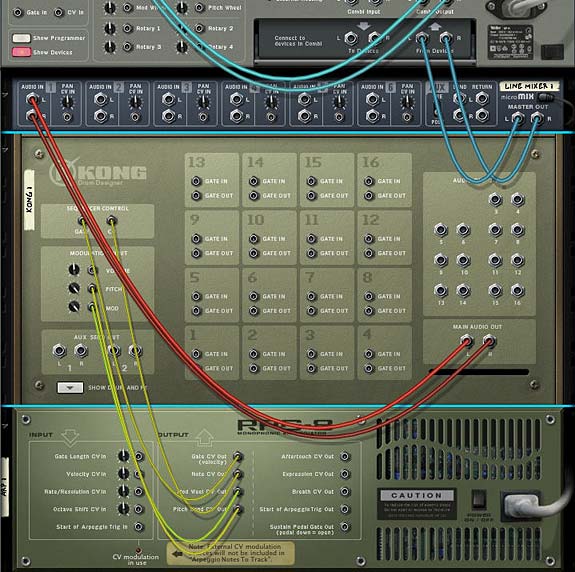
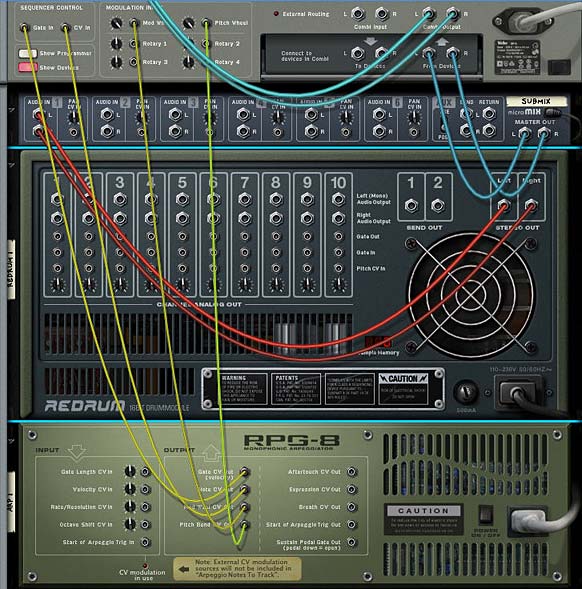
And now for the third and final installment of my series which explores the RPG-8 in depth. In this tutorial, I’m going to go a little deeper and explore the CV and Pattern possibilities, using the Arpeggiator for some versatile sound control techniques. So let’s get started.
You can download the project files here: advanced-arp-setups. There is one .RNS file which contains the 3 setups discussed below. In addition, the 3 separate Combinators are included. The whole thing is in a zip file. Open them up to follow along with the ideas below.
The RPG-8 CV Inputs
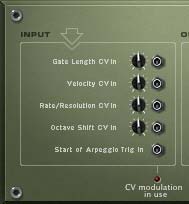
Before jumping into the setups, it’s important to know some of the more advanced CV options that are available on the back of the RPG-8 device. These include the following 5 CV inputs:
- Gate Length CV In
- Velocity CV In
- Rate / Resolution CV In
- Octave Shift CV In
- Start of Arpeggio Trig In
Note that if you use any of these CV connections, the changes that they affect on your Arpeggio will not be reflected if you “Copy Arpeggio Notes to Track.” In other words, if you see the blinking light at the bottom of the CV connections on the back, AND you copy your arpeggio notes to track, the notes will not sound as intended (or with any CV input changes). But as I said in the first part of this series, there’s really very little need for you to copy the notes to track in the first place. Instead, keep any RPG-8 devices included in the .RNS file. This way, you’ll never come up against this problem.
Note: When using the CV inputs, the incoming CV is merged together with the setting on the front panel. For example, if your Gate Length is set to 40, and a CV value of +10 is sent to the Gate Length CV Input, then the resulting Gate Length will be 50. Same goes for the first 4 CV inputs. “Start of Arpeggio Trig In” is either in an “on” or “off” state, and therefore, this rule doesn’t apply.
If you look at how this graphs to the front of the RPG-8, you can make the following connections, which should help you to visualize what part of the RPG-8 is being controlled via CV:

If you think about this for a moment, it takes a little to wrap your head around the concept. You are using CV to control a device, which in turn controls another device. That’s the gist of it. So armed with this knowledge, here are a few Arpeggiator setups to showcase some advanced Arpeggiator setups. Bear in mind there are probably a million and one ways to set things up. This is simply just a little taste of what can be done.
Note: For the following setups, you should add a simple chord that runs the length of 4-8 bars in a clip on the Combinator’s sequencer track. Then set the Left / Right locators at the start/end of the clip. In the transport bar, click the “Loop” button so that the clip loops over and over (see the project download .RNS file for reference). This ensures you can hear the effect of the Arpeggiator (s) as you play around with the settings.
Using 2 Arpeggiators to Control a Single Sound Source
This is a great way to get familiar with using both the CV input connections, as well as the Pattern section. First, let’s look at the video, and then I’ll briefly outline the setup.
In this setup, you create a Combinator with a 6:2 line mixer. Then create a Malstrom. Set up a basic sound, as shown below. Then add an RPG-8 device underneath the Malstrom. It will automatically be routed to the Malstrom’s Note / Gate CV inputs.
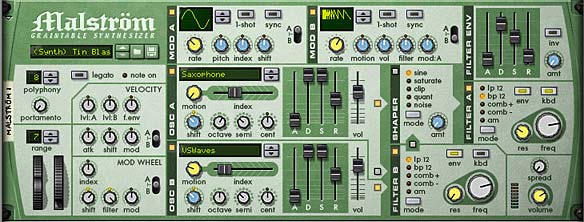
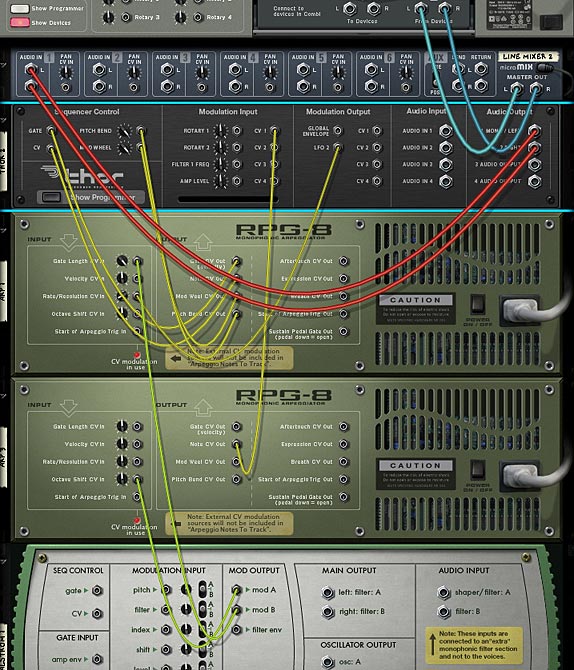
Now create another RPG-8 underneath the first. Flip it around and route the Note CV output into the “Shift” CV input on the Malstrom. Send the Gate CV output of the second RPG-8 into the “Start of Arpeggio Trig In” on the first RPG-8. The note is now controlling the “Shift” parameter of the Malstrom’s sound. And the Gate is now controlling when the first Arpeggiator is going to start triggering (or rather, retriggering).
On the second RPG-8, press the “Pattern” button. Enter in a new pattern by skipping over a few steps (clicking the pattern step lights just above the Pattern window).
Now test it out by playing it. Notice that the notes played in the second RPG-8 determine how high or low the “Shift” parameter goes, and the “Gate” of the second RPG-8 determines the Starting of the first RPG-8 (retriggering). Since you entered a pattern on the second RPG-8, this pattern will determine when and which notes will be sent from the second RPG-8 to the first (as well as to the Malstrom).
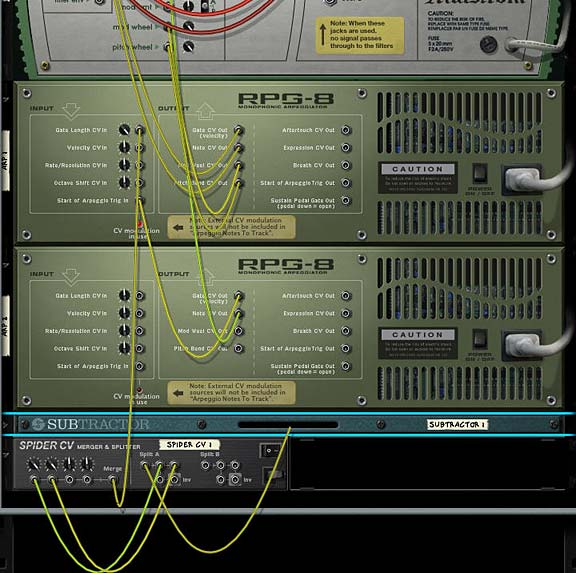
The real fun comes when you start applying various modulations to the Combinator Rotaries and buttons. For example, try setting the “Pattern” of the second RPG-8 as the source for Rotary 1. Now you have a real-time pattern switcher. That’s just one example.
Controlling and Controlled by a Single Sound Source
In this setup, we’ll use Thor to both Control the Arpeggiator, which in turn is used to control the note/gate of the Thor sound source. It’s kind of cannibalistic because you’re using parameters on Thor to control a device which in turn is controlling itself. But you can get some really nice results this way. Here’s how it operates:
The first thing to do is create a Combinator with a 6:2 line mixer. Then create a Thor and RPG-8 device in that sequence. Everything will be auto-routed. Add in your favorite Thor patch. After this is done, create 4 CV parameters in Thor’s Modulation Bus Routing Section (MBRS) as follows:
LFO 1 : 100 > CV Out1
Mod Env : 100 > CV Out2
LFO 2 : 100 > CV Out3
Global Env : 100 > CV Out4
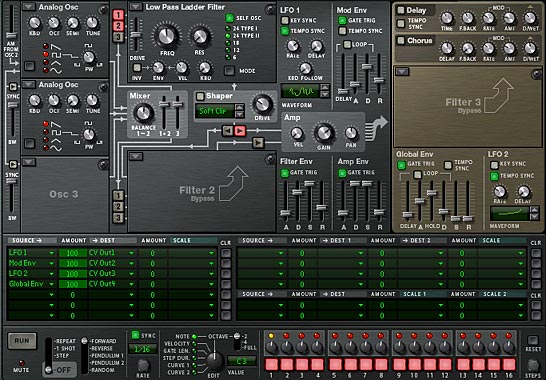
In this way, Thor has four modulations that can be applied to all four CV inputs on the back of the Arpeggiator. Next, flip the rack around and lead each CV Modulation Output to the four CV inputs in the RPG-8, respectively. From there, it’s just a matter of tweaking the settings for the front panel Thor modulations, as well as the front of the RPG-8 parameters and the trim trim pots on the back of the RPG-8 (Remember that the RPG-8 CV Inputs merge the incoming signal with the front panel parameter settings, so you have to strike the right balance between the CV input trim knobs and the front panel equivalents). All three of these things (Thor modulations, RPG-8 CV input trim knobs, and RPG-8 front panel settings) determine the final sound of the Arpeggio coming out of Thor.
Bringing Multiple CV Sources together with the RPG-8
In this type of setup, I’ll use the Waveforms in a Malstrom to affect parameters in an RPG-8, and in turn use 2 RPG-8 Arpeggiators to affect a Thor sound source.
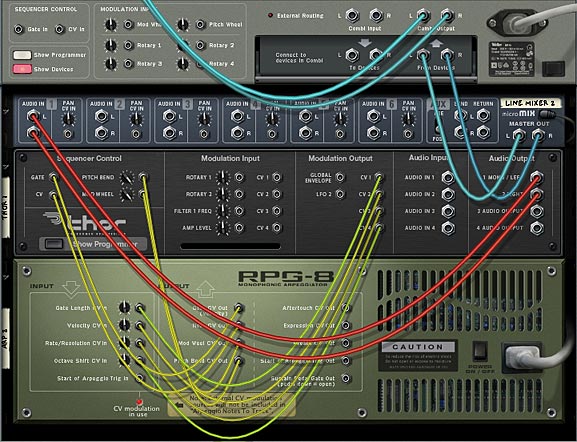
In this setup, create a Combinator with a 6:2 Line Mixer. Then create a Thor device, and RPG-8 device under that. This RPG-8 will auto-route to the Thor device. Then create another RPG-8 underneath that, and finally, holding the shift key down, create a Malstrom device under the bottom RPG-8. Make the following additional CV connections at the back of the rack:
Thor LFO 2 Output > RPG-8 1 Rate/Resolution CV Input (Trim Knob = 12)
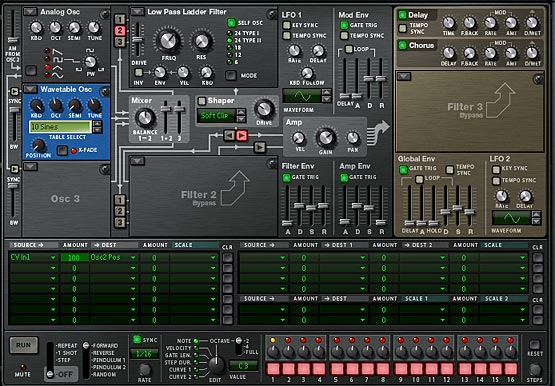
RPG-8 2 Note CV Output > Thor’s CV 1 Modulation Input (Thor’s front MBRS panel should be “CV In1 : 100 > Osc2 Pos”)
Malstrom Mod A Output > RPG-8 2 Octave Shift CV Input (Trim Knob = 64)
Malstrom Mod B Output > RPG-8 1 Gate Length CV Input (Trim Knob = 127)
The front of the Thor device has an Analog Oscillator in the first slot and a Wavetable in the second slot, both going through a low pass ladder filter in Filter Slot 1. See below for the settings:
Once this is done, set up the Malstrom to use both curves. The Curves should be set as follows:
Mod A: Curve #3 (square wave) set to sync with a rate of 5/4
Mod B: Curve #2 (double saw wave) set to sync with a rate of 1/4
The following shows the settings:

Now take a listen to what you’ve created. As in the previous examples, let the sound loop as you make any final settings to the Curve/Rates in the Malstrom, CV trim knobs on the back of the RPG-8 devices, and Arpeggiator settings on the front of the Arp devices. Remember, what I’m providing here are just a few examples of what can be done. There’s so much more you can explore on your own. So take it as a template and come up with your own designs.
Where do you go from here?
Anywhere quite frankly. Another thought I had, which I haven’t tried yet, is to try using the Arpeggiator to control the parameters of the Thor Step Sequencer. I haven’t tried it yet or worked on anything in that respect, but I think you could definitely find innovative uses like this.
I think, when it comes to the RPG-8, there are several interesting possibilities. Just always keep in mind the notes on the sequencer need to be on the Arpeggiator track. This one tip is the one that most pops up when people are trying to figure out how to use the device. So place clips either on the Arpeggiator track, or if the Arpeggiator is inside a Combinator, place the clips on the Combinator and ensure the RPG-8 is “receiving” notes in the Combinator’s Modulation section (it does by default).
So there you have it. A few different approaches to using the RPG-8 Monophonic Arpeggiator in Reason 4 or 5. As you can see, there’s a lot of flexibility to the device. Even those who claim to be purists; drawing in their notes by hand in the sequencer or playing them out on a keyboard controller should be encouraged to take a look at this versatile device. It’s not just for arpeggiating notes you know. Like Thor, there’s a lot under the hood of this device that may go unnoticed, even by professionals. I just hope this encourages them to take another look at one of my favorite Reason devices. Until next, time, thanks for reading and watching, and please leave a comment if you like what you see or you have any questions.

