Since everyone seemed to enjoy the Thor tricks I posted last week, I thought I would continue with the Thor synth and show you a few more ways to work on your synth and sound design chops in Thor. This time, we’re going to discuss the art of crossfading inside Thor. And hopefully you’ll learn some new tricks along the way.
The idea of crossfading can be found in any DAW and you might even have a crossfader on your MIDI Controller as well; that’s just how important it can be. And when you think of crossfading, you usually think of a DJ crossing over from song to song. All of this is valid. However, there are many other ways to cross-fade, and as all good sound designers understand, crossfading can provide an unlimited supply of variety and movement to your sound.
In this series, I’m going to show you a few things you can do inside Thor to gain access to a variety of cross-fading techniques. So let’s get started.
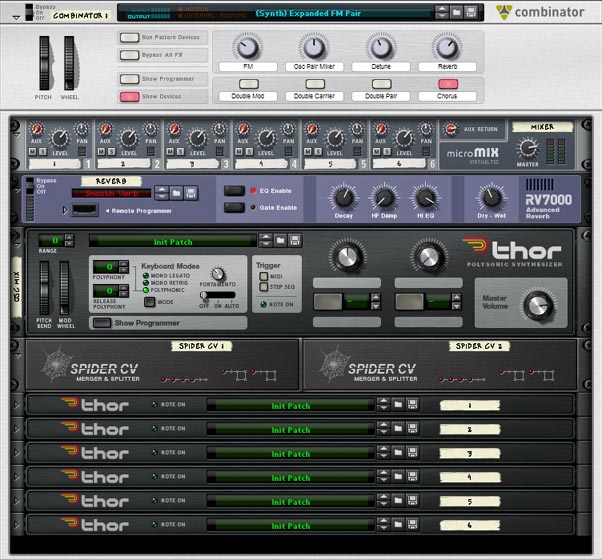
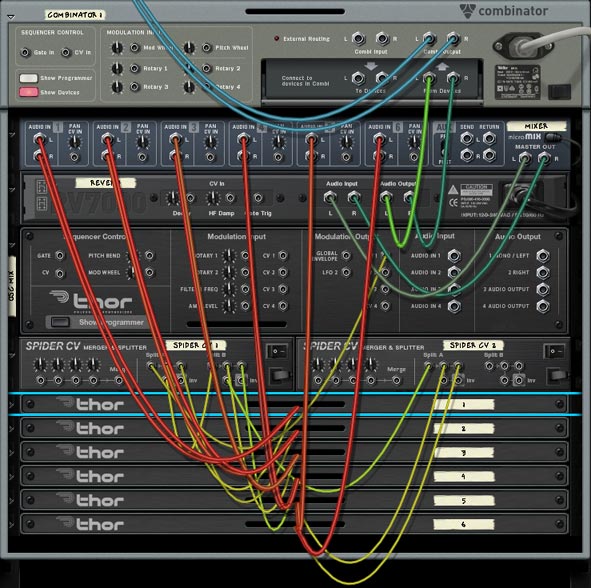
The project files can be found here: thor-x-fade-examples. They include a set of Thors and Combinators to show the various examples I’m putting forth here. Check them out to see how the techniques below are applied.
Introduction: What’s a Crossfader?
First of all let’s define what a crossfade is. Put simply, a crossfade is a control that moves from sound “A” to sound “B,” such that when the crossover is at the middle, an equal part of both “A” and “B” can be heard. As the control starts at the leftmost position, all of “A” will be heard, while none of “B” will be heard. At the rightmost position, all of “B” will be heard and none of “A” will be heard. That’s it in a nutshell.
From an engineering or electrical perspective (which is faithfully recreated in Reason), there are two types of crossfades that can be created: “Linear” crossfade and “Equal Power” crossfade. Without going into too much discussion about these, it’s important to know that the majority of the time you will want an “Equal Power” crossfader control, as opposed to a “Linear” crossfader control. And it’s also important to know that setting up an Equal Power Crossfader in Reason takes a little more work. Linear crossfaders tend to dip in volume as the control nears the middle between sound “A” and sound “B,” which is usually not what you want. For a more in-depth explanation, you should read Kurt (Peff) Kurasaki’s great article on the subject: One Hand in the Mix: Building Crossfaders using the Combinator.
Starting off Slow: Crossfading Oscillators
When you think of designing a sound, you will always start by selecting an oscillator. Since Thor has 6 to choose from, this means we can either crossfade between two similar oscillators set differently, or crossfade between two entirely different oscillators altogether. And the great part is that Thor comes with a pre-built crossfader to do just that: The Mixer “Balance” knob.
Here’s a short video to showcase how to crossfade between oscillators:
Taking things a bit further: Crossfading Filters
The next thing we should take a look at is a way in which to crossfade filters inside Thor. When you start crossfading filters, you would select an Oscillator, and then send them into two different filters. The problem here is that if you use the number assignments to send the Oscillators into the Mixer (buttons 1, 2, and 3) and then on into the two filters (set up in Filter slot 1 and 2), you’ll soon realize that You will always have a mix of both filters in your final output. In a basic one Oscillator sent to two different filters scenario, you’ll end up duplicating the oscillator and will always hear this duplicated sound through the two filters in the final output.
The solution is to break the normal chain of events and bypass the mixer altogether. Turn off all the Oscillator assignments going into the mixer (de-select all button 1, 2, and 3 assignments between the Oscillator and Filters 1 and 2). Instead, have the Oscillator sent to both filters directly, and then use a Rotary to act as the scaling knob for these two assignments. This has the effect of controlling the direction of the oscillator going into filter 1 and filter 2 (controlling the amount of sound passed through into both filters). Doing it this way provides a usable crossfade for both filters, and puts it neatly on a Rotary; all within Thor.
The Modulation Bus Routing Section (MBRS) looks like this:
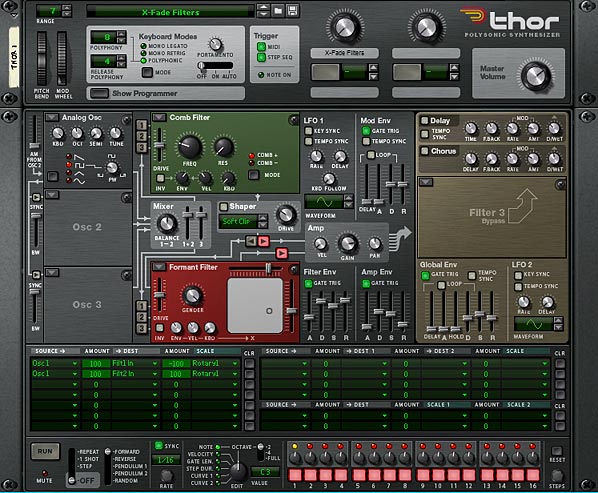
Osc1 : 100 > Filt1 In : -100 > Rotary 1
Osc1 : 100 > Filt2 In : 100 > Rotary 1
The front panel of Thor would look like this:

And here’s a video to outline how you set it all up:
Using Crossfading to Access the Oscillator’s Envelope Amount Knob
This next approach will show one way to solve a problem that has annoyed me since the inception of Thor. If you do a lot of sound design using Thor, you’ll come up against an issue with the Filter Envelope knobs. Put simply, you can’t modulate them or automate them inside Thor. It’s one of the few parameters, along with the sync Oscillator buttons and bandwidth sliders, which you can’t control using the MBRS. Of course, you can put Thor inside a Combinator and use the Combinator programming to map this parameter to a Combinator Rotary. But that’s a bit of a waste of a device.
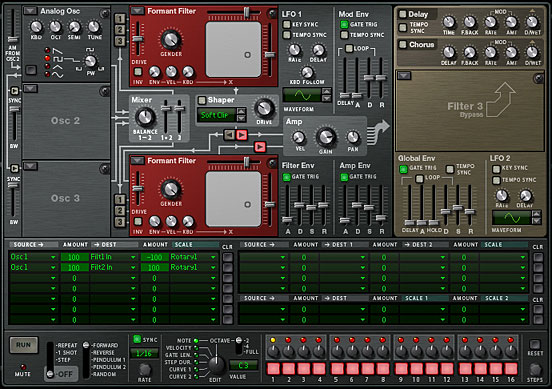
So here’s one solution to do everything within Thor. The idea is to duplicate the exact same filter in filter slots 1 and 2. Both filters have the exact same parameters, except filter 1 Envelope knob is set to zero (0) and the filter 2 Envelope knob is set to 127. From here, we can use the same crossfading filter trick we used before and set up the Rotary to cross between these two filters. In essence, the crossfade works as an envelope amount increase knob. Voila!
But this trick is not without it’s downsides. Though you can send any number of oscillators through both filters. In essence you are losing 1 filter slot (don’t forget you still have filter slot 3 if you want to add a filter into the mix). So this trick is really only useful if you have a setup where only 1 or 2 filters are needed. If you need a third filter or more, you’ll have to send the audio output to additional Thor(s) and use this additional Thor(s) filters.
Here’s what the Thor front panel looks like when we want to access the Envelope knob:

And here’s a video to outline how you set it all up:
One thing you might not have thought about: Crossfading LFOs
This next trick is probably one of the more interesting ways to crossfade elements in Thor. And it’s probably not thought about too much by new recruits to the Reason world. However, it’s a useful setup and can provide some more advanced modulation options. One LFO on it’s own can deliver some nice modulations, but how about mixing two LFOs together? This setup can open you up to a world of new modulations in your sound design. And it’s really not hard to accomplish at all. In this instance, you’ll want to create a second device (Subtractor, Malstrom, or another Thor) in order to access two free-running LFOs.
The essence of this design is to take a secondary LFO source, and send that into the CV1 input on the back of Thor. Once you do that, you gain access to this LFO and can combine it with Thor’s LFO2. Set up both LFOs with different waveforms, and add them to a Rotary, and you have yourself an LFO crossfade in Thor. This can then be used to modulate any parameter in Thor you can think of (Amp Envelope parameters, Oscillator FM Frequency, Filter Frequency, etc.).
The MBRS would look like the following:
LFO2 : 100 > Filt1 Freq : -100 > Rotary 1
CV In1 : 100 > Filt1 Freq : 100 > Rotary 1
And here’s a short video to show you the setup:
So that’s it in a nutshell. Crossfading various parts of Thor can be a lot of fun, and provide a very useful avenue to explore modulations, sound possibilities, and all kinds of crazy routings. What other crossfading ideas do you have? Perhaps crossfading between two Oscillators’ FM Frequency might be an interesting idea. And how about setting up another Rotary to crossfade two LFO’s which affect this FM Frequency. You can do it all inside Thor. No need to step outside too far to get it accomplished.
Good luck in all your music making. I hope this helps to inspire you next time you are designing that killer sound in Thor.


