85 – It’s a Game Changre!

At long last, the much awaited Crapre is here from PEFF! Outstandingly crappy sound quality can only make your tracks betterer than ever. And so I thought I would provide some much needed information and documentation about this heavy duty device. After taking all last month to document Spacre (lengthy article posting to follow), I thought I would give this device a much-needed test-drive and overview. It was a daunting task.

We’re a fun bunch, us Reason developers & users. And PEFF just keeps putting the fun back in Reason. At long last, the much awaited Crapre is here! Outstandingly crappy sound quality can only make your tracks betterer than ever. And so I thought I would provide some much needed information and documentation about this heavy duty device. After taking all last month to document Spacre (lengthy article posting to follow), I thought I would give this device a much-needed test-drive and overview. It was a daunting task.

Crapre
The Craptastic new RE from PEFF. Get it while it’s out. Offers expire on May 1, 2014.

How could I pass up the opportunity to fully document this beautiful device? Download it here: Crapre Guide. And if you want to get your hands on the insanity, it’s available in the Propellerhead shop here: Crapre Rack Extension.

Stack ’em in your rack to make supercrapasonic textures and intriguing effects for all your sounds. It’s the missing preset on the Audiomatic Retro Transformer that you always wanted, and never knew you needed.

It’s a game changre for sure. You should get it for the Combinator skin alone! I might even post some of my crappy patches for it at some point in the future. For now, get it for the love of all the kittens & unicorns out there.

. . . and now back to your regularly scheduled program.

84 – Alias8 Multi-Function Fader

I’m obsessed with figuring out solutions to problems. One problem I recently encountered when I was putting together some files for the Alias8 PDF Guide, was trying to get the Alias8 Rack Extension Fader to double for a second control. I wanted to be able to use it to adjust two different parameters (let’s say Amplitude and Pitch of a SubTractor). The idea and thought process behind it is pretty easy. You adjust the Amplitude by moving the Fader, then click a button, and the Fader switches to adjust the Pitch. Click the same button again, and it goes back to controlling the Amplitude.

I’m obsessed with figuring out solutions to problems. One problem I recently encountered when I was putting together some files for the Alias8 PDF Guide, was trying to get the Alias8 Rack Extension Fader to double for a second control. I wanted to be able to use it to adjust two different parameters (let’s say Amplitude and Pitch of a SubTractor). The idea and thought process behind it is pretty easy. You adjust the Amplitude by moving the Fader, then click a button, and the Fader switches to adjust the Pitch. Click the same button again, and it goes back to controlling the Amplitude.

You can download the example files here: Alias8-Multi-Function-Fader. There are two Reason documents (.reason) and two Combinators (.cmb), which are explained below. The files will work in Reason 6.5 and above. To use them, you will also need the Alias8 CV Controller Rack Extension, which is available in the Propellerhead Rack Extension shop. To use, open up the file and go into the Combinator. Press the “Run Pattern Devices” on the Combinator, or press “Play” on the Matrix. The Matrix is used to gate the Subtractor, and is only used as an example so you can hear something when you tweak the Fader. A more comprehensive explanation is provided below.

To start, what I found is that you can’t completely get this type of functionality to work. Not completely. BUT, here are two ideas that get you pretty close.

1 Control with 2 Functions (V.2).reason / F1 2-Function Control (V.2).cmb Files:

I’m starting backwards here, because this was actually the second idea I had (hence, this is Version 2 in the filenames above). This idea uses two toggle buttons, one for Amp and the other for Pitch. Then, with the proper CV routing and an additional Thor to process the CV, you can map both parameters to the Fader. Click the first Toggle, and the Fader will control the amplitude. Click the Second Toggle, and it switches to control the Pitch. When the Amp toggle is off, you adjust the amplitude. Then click the Toggle button on, and the Amp level is held at the current Fader position. Then click the Pitch Toggle off, and the same Fader now controls the Pitch. Click the Pitch toggle on, and the Pitch is held at the current Fader position. The drawback is that you have to have both Toggle Buttons on to start with, and you can’t turn off both of them, since this would screw up the functionality. One of the buttons always has to be “On.” To get it “set” right again, you need to turn on both Toggles, then, turn one of them off and use the Fader. Sounds confusing, I know. But it’s the most efficient way I’ve found to set it up, as it only uses two Toggle Buttons (aside from the Fader).

The Back of the rack for the "Version 2" example that uses 2 Toggles to switch Fader Parameters and simultaneously "Hold" the CV values via the BV512 devices.
The Back of the rack for the “Version 2” example that uses 2 Toggles to switch Fader Parameters and simultaneously “Hold” the CV values via the BV512 devices.
The CV routings from the BV512 into the SubTractor (destination parameters). The Matrix is there simply to "Gate" the SubTractor, so you can hear something and test out the Fader.
The CV routings from the BV512 into the SubTractor (destination parameters). The Matrix is there simply to “Gate” the SubTractor, so you can hear something and test out the Fader.
The settings for the Modulation Bus Routing Section in Thor.

1 Control with 2 Functions (V.1).reason / F1 2-Function Control (V.1).cmb Files:

This next idea uses three additional buttons (aside from the Fader). The two Toggle Buttons act as the Amp / Pitch selection (as above), but a Momentary Button is used to switch between the two Fader states. The benefit of doing it this way is that you can’t screw up the functionality of the Fader in any way. The two Toggle Buttons act to “Hold” or “Freeze” the Level’s position for the selected parameter. The selection of which parameter the Fader controls is determined by the Momentary button. While I think this is a better method in some respects, it suffers from one disadvantage: You can’t tell which parameter is selected via the Momentary Button. There’s no real visual indication to tell you which of the two parameters are selected. This isn’t a big concern when you have only two parameters switched via the Momentary Button, but if you have several parameters you’re cycling through on that Button, things will get confusing quickly (though you could add a visual indicator with the DDL-1 or BV512 Vocoder, but it’s still not perfect – if interested in how this works, see the Kong FX Chain Builder tutorial where I discuss it at the bottom of the page).

The Back of the Rack for the "Version 1" example that uses 1 Momentary Button to switch Fader parameters, and 2 Toggle buttons that "Hold" the CV values of the Fader via the BV512 devices.
The Back of the Rack for the “Version 1” example that uses 1 Momentary Button to switch Fader parameters, and 2 Toggle buttons that “Hold” the CV values of the Fader via the BV512 devices. Note that the CV coming from the BV512 devices are routed into the SubTractor in the same way as the “Version 2” example (Refer to that image further up in this post).
The settings for the Modulation Bus Routing Section in Thor.

How Does It Work?

The engine of this CV trick is the Thor device. What’s happening is that you are sending the CV value from the Fader into Thor, converting that CV value to Audio, then sending it through the BV512, where it gets converted back to a CV value that is sent out by Band 1 to control the SubTractor parameter (Amp or Pitch). The reason you need to convert it to Audio is because the BV512 Modulation input can be “held” — this allows you to “hold” the Fader value via the Toggle buttons on the Alias8. Note that this is also useful for a lot of other things because it allows you to “Freeze” any CV value in place (for instance, you could freeze the value of an LFO at any time by mapping the “Hold” button to a Combinator button, but that’s going a bit off tangent). There are 2 different BV512 devices because you need to be able to “Hold” each parameter you want to control with the Fader.

Another thing to keep in mind is the CV amount value of 39 in the Modulation Bus Routing Section on the front of Thor. This seems to be the correct value to correctly scale the “CV > Audio” conversion going out from Thor to the BV512 Vocoder. Note that the Rotary is used to Scale this “CV > Audio” conversion, and then the Fader value is going into Thor and modulating the Rotary, which in turn modifies the CV value being sent into the BV512 device. It seemed like the easiest way to set it all up, and the other benefit is that it doesn’t use any routings or mappings in the Combinator device itself.

A Few Additional Notes:

  • The value sent to the Fader seems to be Scalar, not Linear. Anyone who knows how the CV value can be sent to the Fader in a Linear way, please let me know.
  • I also would have loved to have one Toggle or one Momentary button switch between the two Fader parameters (keeping everything in one column in the Alias8), but I honestly don’t think this can be done. However, if you figure out a way, please let me know.
  • Even though this concept creates a multi-function Fader, there’s nothing saying you can’t set it up on a Rotary control instead, to produce a multi-function Rotary.
  • Why is this an important concept? Because it extends the functionality of a single Control on the Alias8, and the Alias8 device itself. For example, with a little thinking, you could create 8 different controls on 4 of the Alias 8 Faders, and still have 4 Free faders left over for more tweaking. Or have all the Toggle Buttons switch 8 different destination parameter controls on a single Fader, and free up the other 7 Faders for more tweaking.

Update

Eric Kloeckner was kind enough to expand on this idea and improve upon the above design. He managed to put the whole setup on a single Toggle button to switch the operation of the Fader between the two modulations. It solves the need for having two separate toggle buttons to drive the two different parameters.

I then took his design and tweaked it a little to make it as straightforward as possible. The concept uses 2 Thors to control the Toggle switch. This, in turn switches the Fader between the two modulation controls. The only downside is that you have to first “initialize” it by pressing the Toggle button at least once. But this is a huge improvement. And my thanks goes to Eric for finding a solution to one of the problems that was bugging me. Download the Files here: Alias8-Multi-Function-Fader-v2. There are two files in this zip:

  1. Example File Combinator: Press play, and then toggle between adjusting the Pitch and the Level using Fader 1 on the Alias8.
  2. Template File: Use the Output A / Output B spiders to send CV values to target multiple parameters as you wish. “A” parameters are adjusted when the toggle button is “off” and “B” parameters are adjusted when the toggle button is “on.” Use this setup to create a template where all 8 faders can have multiple-functions if you like.

Note: There’s still a slight discrepancy between the CV input & output. In other words, it’s still not 100% Fader value CV : Destination value CV. You’ll still get slightly off results (where moving the fader on a single CV value will bump up the Output CV value by a value of “1,”). However, this is very slight, and shouldn’t be a problem in most cases.


That’s it for now. Don’t forget that the Alias8 PDF Guide I put together contains many other creative ideas for this Rack Extension, so check it out as well. Happy Reasoning!

80 – Shelob Audio Splitter

Matt Black (aka: Jiggery Pokery) has done it again. Instead of providing a new ReFill, he has dazzled us with a new Rack Extension: Shelob, a 4-input, 16 stereo /32 mono audio output Splitter. Think of it as 4 Spiders locked together in a nice compact unit, but with a few extras. And all for the low price of $9.00 USD. In this article, I’ll discuss a little about what you can do with this baby.

Matt Black (aka: Jiggery Pokery) has done it again. Instead of providing a new ReFill, he has dazzled us with a new Rack Extension: Shelob, a 4-input, 16 stereo /32 mono audio output Splitter. Think of it as 4 Spiders locked together in a nice compact unit, but with a few extras. And all for the low price of $9.00 USD. In this article, I’ll discuss a little about what you can do with this baby.

You can download a few free patches here:  Shelob Patches. These patches outline a few ways you can use Shelob to crossfade, parallel process, stripe a range of effects splits played via keys on your MIDI keyboard, group splits, create a fade in / fade out combinator, etc. Use them as templates and lessons in how to route things up in Shelob. See the videos below for a little more about how Shelob works.

First, let’s take a look at what Shelob replaces or improves upon:

Spider Audio Merger Splitter - Splitter side
Reason’s stock Spider Audio Merger/Splitter from the back, indicating the split side with 1 audio input and 4 audio split outputs. This is what Shelob replaces.

Next, let’s take a quick look at Shelob from the front and from the back:

Shelob Audio Splitter Rack Extension - Front
The Front of the Shelob Audio Bypass Splitter
Shelob Audio Splitter Rack Extension - Back
The Back of the Shelob Audio Bypass Splitter

The following showcases the differences between the original Spider Audio Merger/Splitter and the Shelob:

  1. Uses 1 device rather than 4 Spiders. Note that the Spider can take 1 input signal and split it 4 ways, as well as take 4 input signals and merge them into 1. On the other hand, Shelob can take four input signals and split each of those signals 4 ways (or any combination of those, for example, you can take 1 input signal and split it up to 20 ways; 16 straight outputs and 4 pass-through outputs). There is no merging capability with Shelob, though I have it on good authority that a merging device is on the way.
  2. Off/On of each of those 4 channels and 16 stereo/32 mono outputs can be automated
  3. Each set of 4 inputs can be used as a pass-through in order to create “Split Groups” that can be turned on/off
  4. Ability to fade the signals in or out. This opens the door to creating crossfades between signals on Shelob, and fade in / fade outs of any audio signal. The Fade is “global” so it affects all signals sent in or out of Shelob. The fade can be anywhere between 1 millisecond to 20 seconds.
  5. Ability to “Stripe” the signal. This means you can take one input signal and send it to all 20 outputs without any additional inputs or routing.
  6. All switches on the device can be automated or programmed in the Combinator to be on / off. In addition, the fade knob can also be automated or programmed to a Combinator control.

Here’s a quick introduction to the device:

Fade Knob

The fade essentially determines how long the sound “fades out” after you turn that specific channel from “On” to “Off.” In the default position, turn any channel off and the sound stops immediately. With more fade, turning any channel off will let the sound fade out slowly. This also works both ways, so you can “fade in” a signal when you turn a specific channel from “Off” to “On.”

Fade is global, so it affects all channels, and it can be automated. But of course you can create multiple Shelobs to control fade on some channels and then fade differently on others.

From Matt:

Fade times work both ways – switch on (fade in), and switch off (fade out).

As Rob says above, Fade time can be automated as required.

With a maximum fade time of 20s, you could even stick a Shelob on your master outs, or just before Ozone if using that for dithering, and flick a switch for fade in at the start and fade out at the end

The Fade knob is 0-100 milliseconds in the white area, and 101-20000 milliseconds (20 seconds) in the green area. This means you can create a fade 0-20 seconds long. To create a simple crossfade between two signals, for example, program a Combinator Button to switch Channel 01-A to go on/off and Channel 01-B to go off/on. The button is now used to crossfade between the two signals. Program the Rotary 1 to adjust the Fade knob and use it to determine the fade time from 0-20 seconds. This makes it one of the easiest ways to crossfade between two audio sources or two effects.

Here’s a video that shows you how to Crossfade and parallel process your audio signals:

Stripe Switch

With the Stripe switched turned on, you can send one audio signal into Channel 1 input, and then split that signal on all outputs (A through P) at once, without any further input signals. This means you don’t need to Chain an output split to the next 3 Channels (for example, from A-1 to Channel 2 input). With Stripe Off, the Channels can be used separately (as if you have 4 independent Channels in Shelob, or more to the point, the Shelob acts more like 4 Spider Audio Splitters in one).

Incidentally, if you want to use Shelob exactly as you use the Reason Spider Audio Splitter, keep Stripe off, and turn on all output splits (A through P). Now, all splits are open or on, and you can send four different audio inputs into all four Channels and split them into their respective splits.

Also, with the Pass-Through, you gain an additional output on each Channel, meaning that you have 4 extra Splits (for a total of 20 outputs). Though this is not the intended use of Pass-Through (discussed more below), you can indeed use it this way.

Again, from Matt:

While you can get 20 ouputs, the recommended setting here is to not connect the Pass jacks, but you can do.

Put your input into Channel 1, and turn on Stripe. Channel 1 will then be sent to Channnels 2, 3 and 4. Now you can turn each Channel off/on either as a Channel group with it’s Pass Switch (hence why it’s recommended not to use the Pass Jacks), and you can turn all Channels 2, 3 and 4 on and off simultaneously via the Stripe switch!

This opens the door to a lot of possibilities. Here’s a quick video to show you how to use the Stripe Feature and showcases a few of the included Combinators:

Inputs 1, 2, 3, and 4

Simply, this is where you input your audio source(s). Pretty straightforward. There are four Channels, and you can source four audio signals.

Pass-Through 1, 2, 3, and 4

Pass-Through allows you to send audio from one Channel to another. Since each Pass-Through has an on/off switch on the front of the device, this means you can “group” your splits and turn on/off all four splits of each channel with one switch. To use it, simply ensure you have an audio source going into a Channel (let’s say Channel 1, for example). Then send the Pass-Through from Channel 1 to the input of Channel 2, 3, or 4. Now, the audio source into Channel 1 is also input into Channel 2, without the need to steal a split from Channel 1 to chain Channel 1 to Channel 2 (via split A, B, C, or D). This is one other advantage Shelob has over Reason’s Spider Splitter.

Here’s a video to show you how Pass-Through operates:

Splits A through P

The Splits take whatever Audio is input into a Channel (or from a previous Channel, if Stripe is turned on), and sends it out to whatever destination you like. You can send a split out to other effect(s), or straight to a Mixer Channel or to a Mix Channel device, or other splitters. The audio can be sent to whatever audio destination you like.


That’s the Shelob utility Rack Extension in a nutshell. Hopefully, this gives you some ideas and helps you understand how to use the device. Check out the attached Combinator patches and have some fun playing with it. For less than the price of an iTunes album, it’s well worth the expense to get a little more functionality out of audio splitting. Happy Reasoning! And thanks so much Matt, for such a great addition to the Rack. Cheers mate!

Polar+Essentials Patch Pack

It’s another “Freebie Friday” here at Reason101 and this time I thought I would bring you more new instruments and effects for those with Polar and Reason Essentials. Last week’s Pulsar+Essentials Patch Pack seemed to be a hit, and generated some new ideas and thoughts from all you good folks. So let’s see if we can repeat that this week as well. And what better way to start the weekend than with a few new sound ideas. So download and enjoy.

Polar + Essentials Patch Pack.It’s another “Freebie Friday” here at Reason101 and this time I thought I would bring you more new instruments and effects for those with Polar and Reason Essentials. Last week’s Pulsar+Essentials Patch Pack seemed to be a hit, and generated some new ideas and thoughts from all you good folks. So let’s see if we can repeat that this week as well. And what better way to start the weekend than with a few new sound ideas. So download and enjoy.

The Polar+Essentials-Patch-Pack contains 11 Instruments and 9 Effects. Since Polar can save and load patches, some of the effects patches can be loaded directly into Polar. Some of the more complex effect patches and all instrument patches are Combinators. You will need to download the Polar Rack Extension in order to use any of these patches. While they were built for Reason Essentials 1.5  users in mind, there’s nothing stopping those who have the full version of Reason 6.5 from taking advantage of them. Try them out and if you like them, please consider donating: [paypal-donation]

There are two sections:

  1. Instruments — Use Polar in some way to enhance or add to the core Reason Essentials instrument’s sound (for example, the Subtractor, ID8, and other Essentials instruments).
  2. Effects — Use Polar on its own or with other effect devices in order to process your instrument in some way.

Here is a brief description of each patch you’ll find inside this pack:

Instruments

  • Aggrodesiac.cmb

This patch uses a Matrix to create an arpeggiated synth. The cool idea in this one has to do with using a Matrix Curve to play the Pitch shifting on Polar. To access this sound, you must first press the “Run Pattern Devices” button on the front of the Combinator. Then use Button 1 to turn on the Matrix sequencing, and Rotary 1 to adjust the Matrix pattern’s Rate. The main rate of the sequence can be controlled via Rotary 4. Rotary 2 detunes the Pitch shifters on Polar, creating a wider sound. And Rotary 3 controls the Phase offset in the Subtractor instrument.

Button 1 changes the LFO2 on the Subtractor from adjusting the Phase (Button off) to adjusting the Amp (Button on). Button 3 adds a heavy dose of Portamento, and Button 4 allows you to switch between playing the patch as a Mono lead (Button off) or adding Polyphony (Button on).

  •  Arpe Dulce [RUN + Play MIDI].cmb

This patch is another Arpeggiated sequence in which you can Run the Arpeggio by pressing the “Run Pattern Devices” button on the Combinator front panel. Once you do this, you can play the MIDI keyboard to hear the sequence. Note that you don’t HAVE TO run the pattern devices, but it might be a little dull and lifeless without it. You could also mess around with the Matrix sequencer to create your own arpeggiator if you like.

The cool thing about this patch (and the take-away I think), is the way in which the Matrix is used to “Gate” the Polar device. Notice on the front of Polar, the “Env to Amp” button is lit up. Essentially, the Matrix Gate/Note CV is used to trigger the Polar’s envelope section. Then this envelope section is sent to the Polar Amp section. The envelope parameters you set in Polar affect the Amplitude, as you would adjust the Amp Envelope in any of Reason’s synth devices. This is what causes the gated sound. I’ve also mapped Rotary 2 (Staccato) to the Envelope’s Release parameter. This has the effect of creating a very short Staccato sound as you turn the Rotary left. The sound gets longer as you turn the Rotary right.

  • Dreamy Island Progression [RUN].cmb
  • I-vi-ii-V (Blue Moon) Progression [RUN].cmb
  • Polar Synth Chord Progression [RUN].cmb
  • Wurly Triplet Progression [RUN].cmb
  • Wurly Trip MK II [RUN].cmb

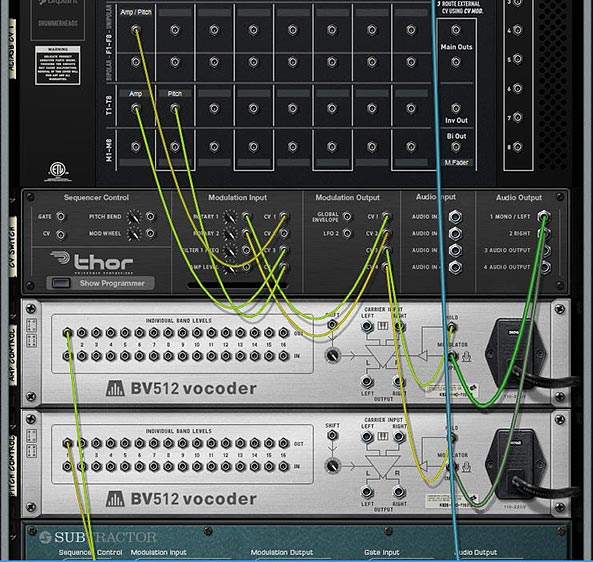
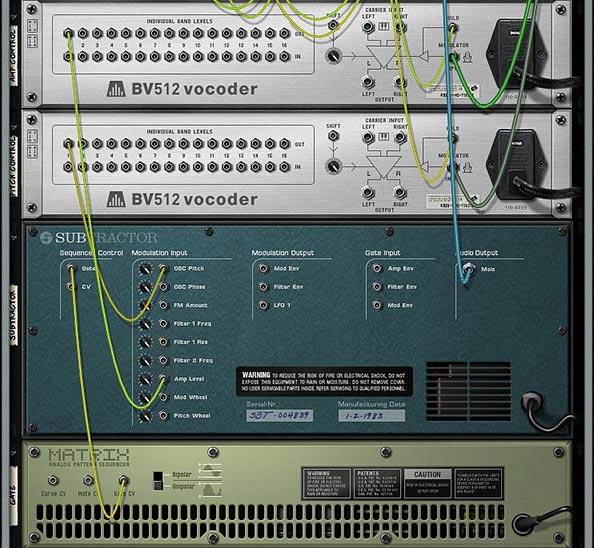
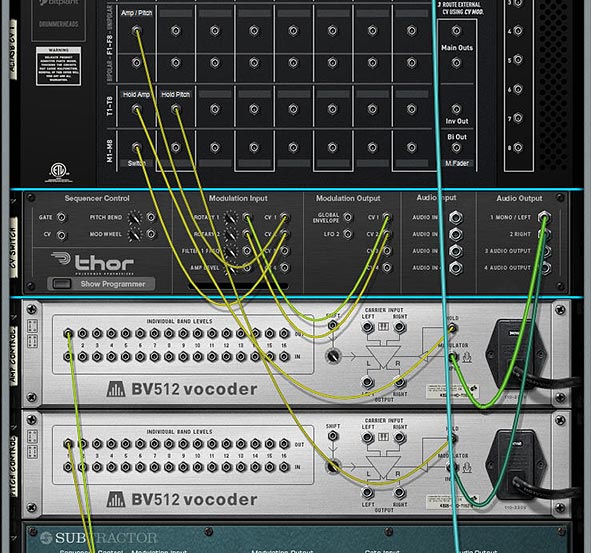
These patches use 3 Matrixes and 2 Polar devices to control Harmonies by shifting the three notes found in chord triads. Each Matrix controls a single Pitch Shifter. There is a root, third, and fifth pitch shifter and when summed together, they provide the chords. Then a fourth Matrix is used to control the Note/Gate of the instrument. This provides the Rhythm mostly. All these instruments are in the Key of “C,” though some patterns venture outside this a little, creating some interesting sequences. To play the patch, you have to press the “Run Pattern Devices” button on the front Combinator panel. As long as button 1 is lit up on the Combi, the Note/Gate Matrix is turned on, and the pattern will run automatically to generate the sounds. Button 2 controls whether or not the Harmonies for the three pitch shifters are enabled or not. All three must run in tandem, so if you do decide to change the Resolution of any of the Chord Matrixes, ensure you change all three to the same value (otherwise the chords will shift out of sync – though maybe this is what you want).

Rotary 1 controls the Pattern used to play the patch. There are 4 patterns from which to select, and one of the patches has 6 patterns. Rotary 2 and 3 Control parameters on the device itself. Since most of these patches use the ID8 as the main instrument, I”ve mapped Rotary 2 and 3 to Parameters 1 and 2 on the ID8. Rotary 4 controls the Volume of the instrument. Button 3 controls the Analysis Type and Algorithm of the Polar Pitch Shifter. For the most part, if you leave Button 3 off, you have a fast pitch shift. If you turn Button 3 on, you have a slower pitch shift. Button 4 is used to spread the Chords across the Stereo Field. In one patch, Button 4 is used as an auto-panner.

The Pitch Shift Wheel is mapped to the Polar pitch shifter, and the Mod Wheel is mapped to the ID8’s hard-coded Mod assignment, which usually leads to a Vibrato effect.

I should note that you CAN play the patch via MIDI keyboard controller. Simply turn off Button 1. If you then keep Button 2 turned on, you’ll still hear the Chord Shifting as you play, provided the notes are sustained. If you turn off Button 2, you can still play the patch via MIDI, but this may be a bit boring. Still, you can do it.

Note also that since these patches use Matrixes, there may be a lag before the Matrixes kick in, which, depending on your song Tempo and the Pattern length, could be very short or a little longer. Best thing to do if you switch the pattern on Rotary 1 or turn Button 1 or 2 on is to give it a chance to kick in. However, turning buttons 1 and/or Button 2 off is instantaneous.

Dreamy Island Progression uses a Subtractor as the main instrument and it’s a fairly slow tempo sequence. It’s got a Carribean-type flavor with a nice meandering synth sound.

I-vi-ii-V (Blue Moon) Progression uses an ID8 set to the “Crystal Pad” Synth. It also provides a very mellow and slow progression. The idea here was to present one of the most common major chord progressions and show how it is put together. So this should sound very familiar.

Polar Synth Chord Progression uses an ID8 set to the “Synth” Bass. It’s a little more harder edge, with a faster sequence. It also doesn’t really come out sounding like a Bass; more like a synth lead. You can have a lot of fun simply toying with the “Tone” Rotary (Rotary 2).

Wurly Triplet Progression is probably my favorite of the bunch. Who doesn’t like a good Wurlitzer sound right? The Note sequencer is set to Triplet, and funny story: I had the chord Matrixes set to 1/2 Resolution, and forgot to set them to 1/8T during the creation stage. Of course if you change them, you’ll get a totally different sound. But it didn’t sound right, so I left them at 1/2 Resolution. It gives a much better Rhythm I think.

Wurly Trip MK II is slightly different than the Wurly Triplet Progression patch. It includes Drums, and only uses one pattern for the sequence. Instead, Rotary 1 allows you to transpose both the Piano and the Drums upward by 1 octave (in semitone increments). This way, the patch shows how you can program the Matrix to play the harmony sequence in any scale. It’s a slightly different take on the previous patch. Also, both the Piano and Drums have a lot of processing going on. In this respect, the Combinator is more of a “Song Starter” than single instrument patch.

  • Effigy Pad.cmb

This is my take on a Subtractor Pad, and uses 2 Subtractors and 2 Polar devices. The Polar devices are used to expand or widen the sound. The Rotaries are used to adjust the fattening of the sound via the Polar parameters (except Rotary 4, which is used to adjust the Polar Filters). The first three Buttons are used to change the Timbre of the sound, so that you can get more flexibility out of the patch. The final Button (Button 4) is used to pan the signals left and right on the Mixer, which again widens the sound in the Stereo field. The Mod Wheel also changes the Timbre of the sound, making it more ominous when the wheel is pushed upward. Pitch Bend naturally adjusts the instrument pitch upward or downward.

  • Fortitude Lead.cmb

This patch uses a Subtractor as its base sound, and Polar is used to both Widen the sound and provide Harmony (if you want, on Button 4). Using Button 4 shifts the pitch so that a major chord is played (Root – Third – Fifth / 0 – 4 – 7 interval). If the Button is off, a single note is played (Monophonic). There’s other fun things you can do with the sound, but as far as Polar is concerned, this is about as basic as you can get. The Polar setup in this patch really amplifies and lifts the sound up from boring to vibrant. Bypass Polar to hear the difference.

  • House of Mirrors.cmb
  • Serial Polar Strings.cmb

These are two other Instrument patches, and are probably the most “out there” of the bunch.

House of Mirrors is a very bouncy synth sound. It uses the “Gating” trick I described earlier, except this time, the Subtractor’s LFO is used as both the Gate and as part of the CV used to “Lock” the Delay Buffer in Polar. The CV in both this and the “Serial Polar Strings” patches are a little experimental and convoluted, but the experimentation was fun, and I think the results came out alright.

Serial Polar Strings uses an ID8 “Guitar” patch set to “Dulcimer.” I thought of trying to process the sound through two Polars that are connected in series. I found that doing this is very tricky, as the sound going from one to the other becomes pretty finicky. It’s hard to describe exactly, but it took a lot of work to try to get something interesting out of it. I’ll let you decide if it was worth the work or not.

Effects

  • Alien Galaxy.repatch
  • Creeper.repatch
  • Harmony Modulator (For Leads).repatch
  • Simple Octave Gate.repatch
  • Spiral Staircase.repatch
  • Tin Man.repatch

These are some basic Polar stand-alone effect patches.

Alien Galaxy creates an almost other-worldly sound that works well with most synth patches.

Creeper is exactly what it says. It shifts and modulates the sound to produce a highly spooky sound. Great for all kinds of sounds, but I like it with a Lead or a Pad sound. Just be careful if you’re using it with multiple notes (Polyphony), as it can tend to get a little loud. If you do, you may want to turn the Volume down on the dry signal and the two shifters.

Harmony Modulator (For Leads) is a rough harmonizer patch that works well on monophonic leads. Just a simple way you can add movement at the same time as harmony. Fun little rough patch.

Simple Octave Gate is a double-Octave spreader (up 1 Octave and down 1 Octave), with a rough LFO gate applied to the Low Pass Filter. Cool for most any kinds of sounds that you want Gated. The LFO which produces the gate is Tempo Synced, so if you want it faster or slower, simply adjust the LFO Rate.

Spiral Staircase is a slow-moving patch that takes advantage of the reverse sawtooth LFO wave to shift both pitch shifters by 50% – producing a downward moving pitch. At the same time, the auto-pan feature is applied to the original (Dry) sound, and the Feedback / Delay / Detune parameters produce a wider sound. Interesting in a wonky kind of way.

Tin Man, as the name suggests, provides a metallic chorus sound. Try it out on your guitar tracks. All guitars love a good Comb filter right?

  • Mayhem Glitchem.cmb

This patch is highly experimental. Basically, it sends the audio through a Polar device, then splits the audio into two streams: one is the original audio, and the second is a Hi band pass through two Screams and a second Polar. It’s fun to tweak around with the parameters on this one. There’s two Distortion algorithms on Button 2, and you can adjust Parameter 2 with Rotary 2. Rotary 1 and Button 1 adjust the Rate of the first Polar’s LFO, which can provide some really freaky sounds.

Rotary 3 and 4 control the original Audio Level and the Screams’ Distortion Level. Pretty straightforward. Use these two Rotaries to parallel process and mix the sound together. Button 3 changes the first Polar’s Algorithm from fast to slow. Button 4 is an added bonus. It allows you to lock the Buffer (Delay) from both Polar devices. Depending on the patch you’re sending through this effect Combinator, you can get some interesting glitchy effects when the Buffer is locked.

The Mod Wheel actually detunes both shifters on the first Polar, and the Pitch Bend Wheel is tied to the original Polar’s Pitch Bend Wheel.

  • Pseudo-Doppler (For Sustained Sounds).cmb

This patch is a simple Polar device that’s doctored up inside a Combinator. It creates a really cool Doppler-style effect (as dopplers inside Polar can go, that is). The Loop Length can be adjusted via Rotary 1. The shorter the loop (towards the left), the shorter the Doppler sound is. The longer the loop, the longer the amount of original sound gets through (and the more strange the sound becomes). You can also play with the Pitch Width on Rotary 2 and the Amp Width on Rotary 4. The LFO Rate on Rotary 3 controls the speed of the Doppler effect (slower speeds to the left; faster speeds to the right).

Button 1 switches the filter from a Low Pass to a High Pass, and Button 2 is used to widen the Filter. In this control, as in all the other “Widener” controls, the LFO intensity increases for said parameter. For example, with Button 2 turned off, the LFO affects the Filter to a smaller degree than if Button 2 is turned on. Likewise for the Pitch Widener. Turn it to the left and the LFO affects the Pitch Shifters to a smaller degree than if you turn this Rotary to the right.

Finally, Button 3 adds a huge amount of Resonance, and Button 4 allows you to include the dry signal, if you like. The Mod Wheel is also mapped to the Polar device. Try this out on sustained sounds, like Pads, sustained Organs, or even Guitars.

  • Tape Stop Lite (Btn 1 or Mod Wheel).cmb

This patch came out of my desire to rework a patch that I put together for inclusion with Polar. If you look in the patches that ship with Polar, there’s a Tape Stop patch under the “Tweaky” folder. This patch uses a Thor to gate the Polar device, which helps drive the Tape Stop effect. The reason why I wanted to rework it is so that I could recreate the same type of effect using only Reason Essentials devices. In this instance, a Scream is used to convert the incoming audio to a CV signal, which then triggers the gate on Polar. This has almost the same effect as the original Tape Stop patch, but without the need to use Thor. This means that even Reason Essentials users can take advantage of a fully functional Tape Stop Combinator effect.

Button 1 or the Mod Wheel is used to trigger the Tape Stop action. This the heart of the effect. All the other Rotaries, Buttons, etc. are used to adjust how the Tape Stop sounds or how fast / slow the tape stop effect works.

One note about this Combinator. If you enable the Tape Stop effect (button 1 or Mod Wheel), and then disable it too quickly, you’ll hear the original sound kick back in. So it’s probably not the most ideal solution for rapid stuttering. And in most cases, I would assume you’ll want to use this effect at the end of a passage instead, where the effect is enabled and the song ends, for example. In this case, you won’t need to disable the effect after the fact, so it won’t be a problem. And who knows, maybe there’s some creative call for having the sound jump back in. Either way, this “issue” only occurs with this “Lite” Combinator. The one that ships with Polar does not work in the same way, and the sound does not come back in afterwards. If anyone knows a workaround for this issue, please let me know. 🙂


That about does it for Freebie Friday here at Reason101. If you have any cool Polar patches, please share them. I’m always on the lookout for new ideas on how to use these devices, whether they be the stock Reason devices or the new Rack Extensions. Carry on. . .