Complete coverage of Reason 7.0 Core devices & 8 Rack Extensions, with 101 in-depth Tutorials focusing on Basics, Utility constructions, Sound Design, Advanced usage and Rack Extension integration. This book is built from the ground up to explore all aspects of the Reason Rack.
With forewords from Kurt Kurasaki (Peff) and Ed Bauman (EditED4TV).
Robert Anselmi’s Reason101 Visual Guide to the Reason Rack
Complete coverage of all Reason 7.0 core devices & 8 Rack Extensions, with 101 in-depth tutorials focusing on basics, utility constructions, sound design, advanced usage and Rack Extensions. This book is built from the ground up to explore all aspects of the Reason Rack.
With forewords from Kurt Kurasaki (Peff) and Ed Bauman (EditED4TV).
The first half covers all core rack devices & 8 Rack Extensions front and back. All sliders, rotaries, buttons, and audio & CV connections are explored visually. The second half of the book provides 101 different ways you can integrate those devices together to create practical applications.
This manual provides all you need to know to start out using reason and take your skills from Basic to advanced, and beyond. Save time learning the Rack in the most intuitive way possible, and keep your copy handy as a desk reference while you work.
Features & Benefits:
Save time and learn Reason visually, in the most intuitive way possible.
101 detailed step-by-step tutorials cover basic to advanced Reason lessons.
Device section cross-referenced with Tutorial section for easy navigation
Learn the secrets of Reason sound design, FX & audio routing, and utility construction.
Merges the theory with the practical, offering many creative ideas along the way.
Useful as a handy desk reference when looking for answers.
Premium options provide an additional 250-patch ReFill and coil binding.
Full Color options with higher quality paper.
All options provide both an electronic PDF & printed book.
Picks up where the Operation Manual leaves off.
Ordering Options
Black & White
Color
Standard
Premium
Standard
Premium
Black & White Book
(Perfect Binding).
B&W PDF Copy*
Black & White Book
(Coil Binding).
B&W PDF Copy*
Companion ReFill*
Color Book
(Perfect Binding).
Color PDF Copy*
Color Book
(Coil Binding).
Color PDF Copy*
Companion ReFill*
$49.99 USD.
$69.99 USD.
$109.99 USD.
$129.99 USD.
*Note: To receive the PDF Copy and Companion ReFill, you must forward the receipt that was sent to you from www.lulu.com after your order is placed. Forward the receipt to webmaster@reason101.net. Once I receive your receipt, I will send you the PDF and ReFill download links (depending on the order option you chose). The PDF and ReFill download links will be sent to you in two separate emails, and will be sent to the same email you used to forward the receipt. This is a manual process, so please allow up to 24 hours for download file delivery.
When you click the “buy now” button, you are directed to www.lulu.com to order the hard copy book. You will then receive two emails from Lulu: a “Thank You” email and a “Receipt” email. To receive the electronic PDF copy and Companion ReFill, forward a copy of your Lulu receipt to webmaster@reason101.net. Once I receive your receipt, I will send you the electronic PDF, and ReFill file (depending on the order option you chose). The PDF and ReFill are sent to you in two separate emails, and are sent to the same email you used to forward me the receipt. This is a manual process, so please allow up to 24 hours for download file delivery.
This process must be performed because Lulu does not provide customer information to publishers. Without this information, there is no way for me to track your order, and no way for me to know where to forward the electronic files. The receipt is only used to confirm you have placed an order, and to fulfill the electronic portion of your order. This information will not be shared with any other third parties.
Are the tutorials provided on your Reason101 website found in the book?
While many of the tutorials found on my website are found in the book, most of them have been updated and expanded. I took a year off to organize and update them. In addition, there are numerous tutorials in the book that are not found on the website. Finally, the first half of the book where all the devices are outlined are exclusive to the book, and not found on the website.
What are the product specifications?
Book: 360-pages. Publisher: Reason101. Author: Robert Anselmi. Language: English. Product Dimensions: U.S. Letter 8.50 x 11” or 21.59 x 27.94 cm. Shipping Distribution: www.lulu.com.
PDF (black & white or color): Encrypted PDF Optimized for fast web view (smallest file size). PDF stamped with customer Name / Email / Transaction ID.
The “Reason101 Visual Guide to the Reason Rack” is a book loaded with information. Part technical manual, part creative resource, and part practical “how-to” guide, this takes you on a tour through the past 10 years of my Reason experience, and provides it to you in one comprehensive 360-page volume. Use it as a reference to save you time, and shorten your Reason learning curve. Time to show you what’s inside the book.
The Reason101 Visual Guide to the Reason Rack is a book loaded with information. Part technical manual, part creative resource, and part practical “how-to” guide, this takes you on a tour through the past 10 years of my Reason experience, and provides it to you in one comprehensive 360-page volume. Use it as a reference to save you time, and shorten your Reason learning curve.
I’ve shown you the video and a few still shots from the hard copy. See my previous post for that. So what are you going to get when you purchase?
The book is divided into two main sections:
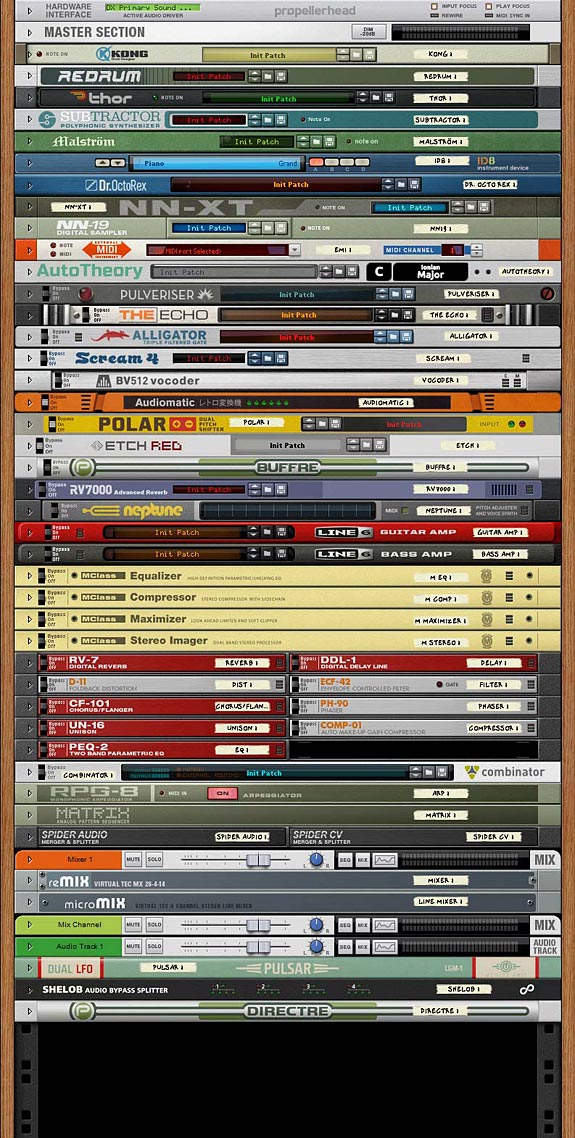
The Core Reason Devices & 8 Rack Extensions outlined fully front to back (see the image below for all the devices covered).
101 in-depth Tutorials that cover Basics, Utility Construction, Sound Design, FX Design, Advanced Setups, and Rack Extension Integration. (see the PDF Table of Contents for a listing of all the Tutorials).
Both of these sections are cross-referenced, so that it’s easy to navigate between the two sections. For example, when you are reading about the SubTractor device, all the tutorials related to the SubTractor are outlined (by number) in the SubTractor heading section. When you are in a specific Tutorial, all the devices used in that Tutorial are outlined in the Tutorial’s heading section.
Note: There’s also a Companion ReFill that will be provided with “premium” options, containing 250 patches. These patches serve to complement the Tutorials. There’s also several additional routing and sound ideas in there for you to explore.
I wanted to give you a few samples from the book. So I’m providing them here as free PDF files:
That should give you a pretty good idea of what you get with the book and the book’s layout. Now for a visual listing of all the devices covered in the first half of the book:
The Book covers all 43 Core Reason Devices, as well as 8 additional Rack Extensions; all of which are shown here.
I think you’ll agree that this is unlike any other Reason book on the market. This is the only Reason book you’ll find that offers a Coil-Bound, full Color purchase option. And the only book that provides a full copy PDF with all purchase options.
You can pick up your copy of the Reason101 Visual Guide to the Reason Rack exclusively athttp://www.reason101.net/shop
A picture is worth a thousand words. 864 pictures and 312,000 words on 360 pages becomes an invaluable story. Especially when what it conveys is everything you’ve ever wanted to know about the Reason Rack in a logical, easy-to-follow way. Take a sneak peek inside the “Reason101 Visual Guide to the Reason Rack” – There’s a lot to cover, with 51 devices presented in full detail, along with many creative and practical ideas, tips, tricks, sounds, and utilities. Stay tuned for more updates to come.
A picture is worth a thousand words. 864 pictures and 312,000 words on 360 pages becomes an invaluable story. Especially when that story conveys the inner workings of the software tool used to get the music in your head out to the world. And especially when that story is packaged in a logical, easy-to-follow book. That’s what you’ll find in the Reason101 Visual Guide to the Reason Rack
Want to know a bit more? Here’s a video that should answer most of your questions about what it is and why you should invest in it:
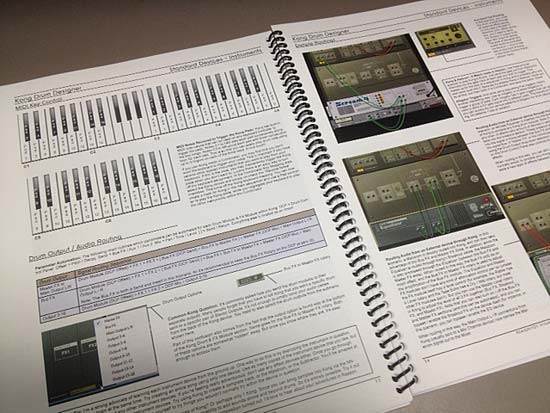
Here’s a little preview of some of the test copies I got back from the printer. 51 devices are covered top to bottom, and there are full visual outlines of how every parameter on each one of them functions. And all this is cross-referenced with the 101 Tutorials on everything from basic to advanced sound design, effects design, and utility construction.
A few pages from the Kong device section (Color test copy)
The idea was to create a dual purpose book whereby the Device section can be used as a quick reference as well as completely cover all front and back panel parameters. The Tutorial section can open up new ideas on how all the devices can be integrated together to create different sounds, effects, and utilities. A complete course in a book.
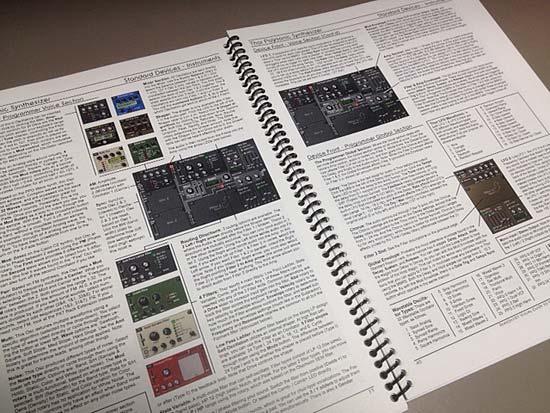
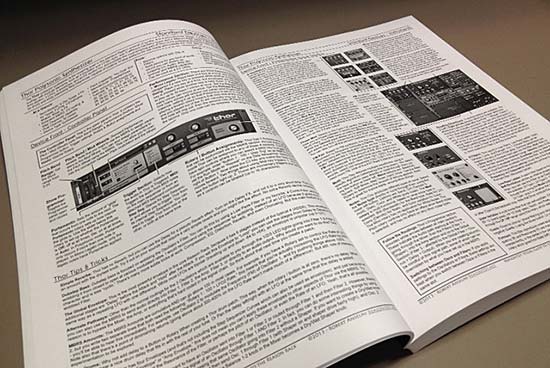
A few pages from the Thor device section (Color test copy)
As I progressed with the devices, I found that you could explain most all of them in a very concise way over 3-4 pages each. Of course, some devices took considerable more space, such as Thor and Kong, which are each about 9 pages. But each page had to be laid out according to the device’s design, not a “one-size-fits-all” book layout. Each page was hand-crafted, and required completely different layouts, balanced against the consistency of the headings, fonts., page size, and other elements to give the book its flow.
I’ve been a technical writer for 12 years, and that often involves working on your own layouts and graphic design. I was very mindful of this when crafting the book to give you the best learning experience I could. Part technical manual, part creative index of ideas, and part practical “how-to,” I hope this book encourages you to push your limits with the Reason software.
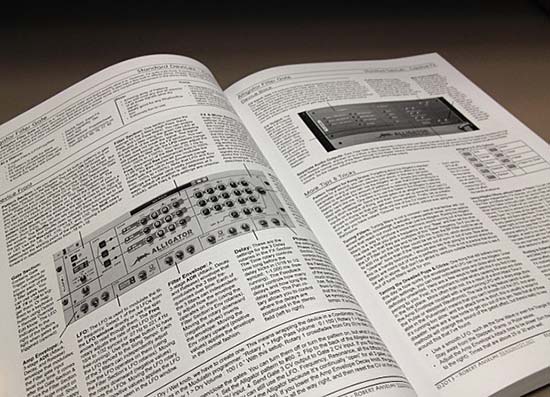
A few pages from the “Thor” section (Black & White test copy)
One of the most important aspects of working on this project was ensuring that all the visuals presented the devices in full view as you would see them on-screen. I wanted to make everything easy to follow and simple to navigate. I didn’t want to intrude too much on the imagery. Therefore, all the call-out lines are simple and don’t cover any important device areas.
A few pages from the “Alligator” section (Black & White test copy)
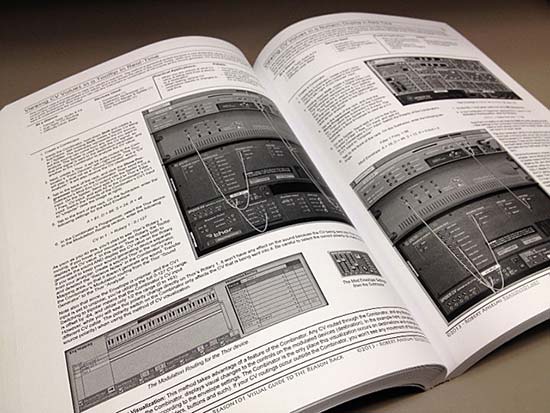
As you can see, all the tutorials have full visuals as well, so you can follow along and recreate exactly what I’m explaining. And with 101 Tutorials, there’s plenty in there to work on. Many of these tutorials also have alternative ways to accomplish something, or additional ideas and tips. This isn’t a rehash of what you’ll find on my website. There are many new tutorials, as well as expansions and re-workings of many of the most popular articles found on my site.
A few pages from the “Tutorials” section (Black & White test copy)
Well, that’s a quick look at the actual copy. Let me know what you think.
You can pick up your copy of the Reason101 Visual Guide to the Reason Rack exclusively athttp://www.reason101.net/shop
10 Years in the making. What I will present to you on December 1st, 2013 is the book I always envisioned for the program, and I want to invite you to stand over my shoulder and see why I find this software such a compelling and creative tool for anyone with a love of music and audio. I wrote the “Reason101 Visual Guide to the Reason Rack” so that I could convey all the amazing things this program can do in a logical, easy-to-follow way. I wanted to shorten your learning curve, and at the same time share my 10-year Reason journey with you. I hope you enjoy learning about Reason as much as I do.
Robert Anselmi’s Reason101 Visual Guide to the Reason Rack
When I first started working with Reason, I was amazed at the breadth and depth of the program. It had such a wide array of devices and options, it made my head spin. And the visual design of the software was truly stunning. I was excited and wanted to learn more. I had longed for a book that would walk me through all these Rack devices, and more importantly, would explain how to connect all these devices together to create what I wanted. It had to be highly visual as well, doing justice to the fine artistic efforts put into the Reason software design. I searched everywhere for a concise and comprehensive book that would teach me all the possibilities. Yet, nothing like that existed at the time. And it was at that point I decided to eventually write that book. I’m more than happy to provide it to you now, a decade later.
What I will present to you on December 1st, 2013 is the book I always envisioned for the program, and I want to invite you to stand over my shoulder and see why I find this software such a compelling and creative tool for anyone with a love of music and audio. I guarantee two things will happen when you invest in it: 1. It will save you time when seeking out answers to how the software operates; making you more efficient, and 2. It will teach you something new; no matter what level of expertise. These are bold claims. And I promise to deliver.
Reason is a gigantic Lego set, and you’re free to construct anything you can think up. Using the devices, audio, CV, and all the related sliders, rotaries, and buttons as your building blocks, you’re free to construct an endless amount of sounds, effects, and utilities.
But without an understanding of how these blocks fit together, it’s difficult to build anything. And that’s where this book comes in. The first half will provide you with the theory. Every core device and 8 Rack Extensions are comprehensively outlined in a clear, concise, and visual way. You’ll learn how each device operates, front to back, A-Z. It can be read straight through, or used as a desk reference when you are seeking out how a particular control or connection works.
The second half of the book will provide you with the practical side of Reason, and can be thought of as a complete course, from basic to advanced, over the span of 101 in-depth lessons. You can read them straight through, or focus on specific tutorials that interest you. To help you navigate through these two sections, I’ve cross-referenced them. This way, you can see the tutorials that relate to a specific device in each device section, and which devices are used in a specific tutorial in each tutorial section.
I wrote the Reason101 Visual Guide to the Reason Rack so that I could convey all the amazing things this program can do in a logical, easy-to-follow way. I wanted to shorten your learning curve, and at the same time share my 10-year Reason journey with you. I hope you enjoy learning about Reason as much as I do.
You can pick up your copy of the Reason101 Visual Guide to the Reason Rack exclusively at http://www.reason101.net/shop
With the introduction of Rack Extensions from Propellerhead, we see a major shift of the company into the Plugin arena, although Rack Extensions are expressed as “plugins done right.” And the Props have introduced 3 new Re devices (Radical Piano, Polar, and Pulsar). Not too bad for a point release. Instead of focusing on the 6.5 release itself, and debating the cost (it’s been done to death in the forums), I thought I would start by taking a tour of Pulsar, a device that is free for 3 months, and $49 thereafter. Hopefully, by the end of this article, you’ll see why the price is justified. Pulsar is simple, fun, and capable of some very unique sound ideas. Let’s take a look at why this is the case.
With the introduction of Rack Extensions from Propellerhead, we see a major shift of the company into the Plugin arena, although Rack Extensions are expressed as “plugins done right.” And the Props have introduced 3 new Re devices (Radical Piano, Polar, and Pulsar). Not too bad for a point release. Instead of focusing on the 6.5 release itself, and debating the cost (it’s been done to death in the forums), I thought I would start by taking a tour of Pulsar, a device that is free for 3 months, and $49 thereafter. Hopefully, by the end of this article, you’ll see why the price is justified. Pulsar is simple, fun, and capable of some very unique sound ideas. Let’s take a look at why this is the case.
You can download the project files here: pulsar-synths. This zip file contains some Combinators and .reason files which go through some of the concepts I’ll discuss below.
Starting off with a simple LFO
At it’s most basic, Pulsar is a Dual LFO. But when you first add a Pulsar to your project, you’ll only be using LFO 1. In many cases, this may be all you need. And if that’s the case, you may be wondering why you would need yet another LFO in the Reason arsenal? Doesn’t Thor, Subtractor, Malstrom, and even some other devices have one or two LFOs that can be used (and have been used) by many since the birth of Reason? Sure. But Pulsar delivers something the other LFOs do not (apart from Pulveriser). It comes with a “Lag” feature. Furthermore, it comes with two other unique features: “Phase” and “Shuffle.”
To recap, the “Lag” feature is an LFO filter which smooths out the shape of the LFO. If you are using an LFO with a sharp edge (Square or Stepped, for example), increasing the Lag feature curves those sharp edges, and can reduce a lot of the abrupt “clicking” that can result from these LFOs.
“Phase” is used to shift the LFO forward or backward, kind of like a pulse width modulation for your LFO. Look at Thor’s Analogue oscillator set to a square wave. The Mod parameter works the same way by shifting the LFO forward or backward (widening or narrowing the LFO). When using two similar LFOs in Pulsar and adjusting their Phases (or automating Phase movement in real-time), you can create some really interesting modulations with the LFOs.
Finally, there’s a parameter we’ve seen time and time again, though not in an LFO: “Shuffle.” This parameter shuffles the LFO, making the movement or LFO automation more erratic. Keep in mind though, that while “Shuffle” provides some randomness to your LFO cycles, the cycles themselves will always be in sync. In other words, the start and stop of the waveform will be random, but their duration will always equal the time cycle that you set up in the timing of the LFO. And it’s important to note that “Shuffle” works in 2-cycle pairs. So looking at a 2-cycle waveform set to 1/4 Tempo Sync means that you have two cycles of the wave that equal 1/4 each. Cycle 1 will always start at the beginning of the cycle, but can end anywhere within both cycles. Then cycle 2 starts and always ends at the end of both cycles. Kind of an interesting strategy if you ask me. But putting the theory aside for a moment, the best way to get a feel for it is to try it out for yourself.
All three of these parameters are fairly unique to Pulsar. And so it might be worth your while to try using this LFO on it’s own the next time your modulation calls for it in your track.
There’s also lots of other interesting things you can do with Pulsar: Sync LFO 2 with LFO 1, Have the Level of LFO 2 affect LFO 1 (AM), have the Rate of LFO 2 affect LFO 1 (FM), trigger the envelope via LFO 2, and this doesn’t begin to get into the CV / Audio modulations on the back of the device. Using all of these features allows you to set up some very complex modulations and even use Pulsar’s LFOs as Oscillators to create some very unique sounding (somewhat Analog-style) synth instruments. We’ll dig into that further below.
But before going further, you should definitely check out the introductory video from the Props on how Pulsar can be used as an LFO and how those LFOs can be used as Oscillators. This is perfect for getting your feet wet with the device. And the final song result at the end of this tutorial is truly inspiring. So before doing anything more, let’s take a first look at Pulsar:
Accessing the Pulsar Patches
Pulsar can’t load or save patches. However, you can contain a Pulsar (along with any other devices to which Pulsar is connected) inside a Combinator and then save the Combinator. And this is a great time to bring up the fact that Pulsar comes with a wide variety of effects and instruments that were put together by some very talented patch designers. Here’s how you can access them:
Right-click on the Rack and select “Create Instrument” or “Create Effect,” depending which option you want.
Right-clicking on the rack and selecting “Create Instrument” or “Create Effect”
The Reason Browser opens. Notice the “Rack Extensions” option under the “Locations and Favorites” area on the left side of the window? Click it, and you’ll see all your loaded Rack Extensions displayed on the right side.
The new “Rack Extensions” stock patch bank in Reason 6.5
From this list, select Pulsar directly by double-clicking it and navigating down the folders to all the available patches. Alternately, you can click the plus (+) sign and drill down to the patch you like.
The Pulsar stock patch bank expanded on the right side of the Browser window.
Double-click on the patch of your choice to open it in the Rack.
The Pulsar patch loaded into the Rack (with a great new Combinator backdrop by the way – nice job Propellerheads!).
Of course, if you’re saving your own patches, you’ll have to save them to your own computer location. All Pulsar patches need to be saved as a Combinator device. So all the patches you’ll find underneath the Pulsar stock patches are Combinators.
I strongly urge you to have a look at these patches. They showcase how you can use Pulsar in all manner of ways. There’s a way to use it as a dual gate, dual wah, LFO filter wobbler, FM, AM, etc. So opening the patches to get a feel for Pulsar is a great way to learn how to use it.
Pulsar as Dual Oscillators: Cheap on CPU, not Cheap on Sound.
And now for the major coup. Yes, you can use Pulsar as a dual Oscillator to create all manner of synth sounds. Trust me, I’ve tried. For those using Reason essentials, this provides a great alternative to the Subtractor synth. You now have a second synth inside Reason. And for those using Reason, you’ll be thrilled to know you not only have a simple synth, but process this synth through Thor, and you have a very amazing sound generation tool that is quite unlike the other sounds in Reason (whether that sound is good or bad is something I’ll leave for you to decide, as it’s a raw aliased sound that some like and some don’t). But nevertheless, it’s a unique sound with which you should experiment.
First, the video:
Let’s start off slow and figure out how to use Pulsar as a synth on its own. Since Reason Essentials doesn’t come with Thor, this is really the only way to go for that group of users. And yes, you can most definitely use Pulsar as a synth on its own. This is really great for Bass sounds, and in my opinion, this is where it shines. So let’s get started with a very simple setup:
Right-click on the rack and select Utilities > Combinator. Inside the Combinator, right-click and select Utilities > Pulsar Dual LFO.
Flip to the back of the rack and send LFO 1 Audio Output 1 from Pulsar to the Left “From Devices” Combinator Audio input. Then send LFO 2 Audio Output 1 from Pulsar to the Right “From Devices” Combinator Audio input. This way, LFO 1 produces the sound for the Left side of the stereo field, and LFO 2 produces the sound for the Right side of the stereo field.
The Routings from the Pulsar to the Combinator
Open the Combinator’s programmer and select the Pulsar device. At the bottom left side of the screen place a checkmark in the “Receive Notes” checkbox. This allows you to play the Pulsar through the Combinator’s MIDI note input.
Selecting the Pulsar device in the Combinator’s Programmer and ensuring it “Receives Notes”
It’s important in this kind of setup to ensure that the parameters for both LFOs are set exactly the same, otherwise you’ll hear differences in the sound coming from both the left and right sides of the stereo field. Start by turning Off the Tempo Sync for LFO 1, and turn On LFO 2 (On/Off button). Switch LFO 1 and LFO 2 Waveforms to Sawtooth waves. Then reduce the “Level” rotaries to 0% for both LFOs. Increase the Shuffle knobs to 70% for both LFOs.
In the Pulsar Envelope section at the right side of the device, reduce the Release amount to zero (0) ms. Increase the Envelope Rate for both LFOs to 100%, and increase the Envelope Level to about 60% for both LFOs.
If you play the Combinator through your MIDI keyboard at this point, there is no key scaling. No matter what key you play, you’ll hear the same note pitch. In order to scale the keyboard, you must turn the MIDI KBD Follow knob on Pulsar fully right to 100%. Once you do that, you’ll have yourself a nice little patch that should play a pretty cool bassline in the C-1 to C2 range.
The Pulsar’s front panel setup
Advanced Pulsar Synth Processing through Thor
Let’s take it up a notch:
There’s two ways you can process Pulsar through Thor: Both methods involve sending the audio outputs from LFO 1 and LFO 2 into Thor and then entering the following two lines into Thor’s Modulation Bus Routing Section (MBRS):
Audio In1 : 100 > Filt1 In
Audio In2 : 100 > Filt1 In
As long as both the Pulsar and Thor are receiving notes, and are inside a Combinator, you’re all set. Ensure that both LFO 1 and 2 on Pulsar are not Tempo Synced, and turn the rates all the way up (fully to the right). Also keep the Pulsar Envelope settings at their default, and turn the MIDI KBD Follow knob all the way right to 100%.
The cool thing about this setup is that you can use Thor’s Portamento, Shaper, Filter 1, Filter 2, Amp Envelope, Amp section, and pretty much everything else in Thor to shape the sound of the Pulsar LFOs. In this instance, you’re simply replacing Thor’s Oscillators with Pulsar’s LFOs (which are used as Oscillators).
One thing to keep in mind with this approach is that since you’re processing the audio through the Amp section, the levels of your audio are going to be adjusted using both the Thor Amp Gain and Pulsar’s LFO Level controls. So watch those levels!
The second approach builds on the first and bypasses most of Thor by sending the audio into Filter 3. So after you’ve entered the two audio lines in the MBRS as above, enter the following two lines in the bottom right two MBRS entries as follows:
With this approach, you’re bypassing everything between Filter 1 and Filter 3. This means no Shaper, no Filter 1 and 2, and normally, no Amp Envelope either. However, since you’re scaling the audio using the Amp Envelope explicitly in the MBRS, then you can still use the Amp Envelope to adjust your audio. The advantage is that you gain a 4-stage envelope (Attack, Decay, Sustain, and Release) with Thor, instead of a 2-stage envelope with Pulsar (Attack and Release). Also, you can use the Delay and Chorus FX in Thor to affect the synth sound.
One note though. You can’t use Thor’s Amp section for any adjustments. So all the volume control resides in Pulsar’s LFO 1 and 2. And it suddenly occurs to me that all of this is in the video, so check it out if any of this sounds esoteric to you. Have fun!
Oh and in case you missed it, here’s James Bernard’s take on Pulsar. Pretty awesome sampling technique. Don’t miss this one either:
The downside is that you need Reason to do these wonderful Thor processing tricks. No can do with Reason Essentials. So upgrade already!
So that’s how you set up Pulsar as a synth. Try out the different waveforms and have a blast making some new sounds. And if you have any other Pulsar tricks, be sure to let us all know. Cheers!

 Robert Anselmi’s Reason101 Visual Guide to the Reason Rack