This project was a real blast to put together. Essentially it involves turning a Combinator into a 61-synth drum kit that spans the range of the Matrix pattern sequencer so you can use the Matrix to trigger your drum hits. Yes it’s massive. Yes it’s crazy. And yes, you should try it out! Why? Because apart from being time consuming, it’s dead easy to accomplish. And it doesn’t have to break the CPU bank.
Download the project file here: minimal-super-kit. This zip file contains my Minimal Super Drum Kit Combinator with 61 synth sounds that can be played by the Matrix. I’ve added 32 random patterns in the Matrix which is assigned to a Rotary knob so you can dial in a pattern you like. Also, you can turn the matrix off using button 1, so that you can play the drum kit with your keyboard controller if you wish. This is a great flexible way to show off your drum kit creation chops. So enjoy! And when you’ve had it with my own drum sounds, try your hand at creating your own. Read on to find out how.
There’s also a few extra devices in the Combinator, and assignments on the other Rotaries / Buttons which affect the drums globally. Feel free to explore their routings as well if you’re interested. The focus here, however, is turning your Combinator into a massive drum kit which can be sequenced using the Matrix.
Back to Basics: Setting things up
- Open up a new document with a 14:2 Mixer and then create a new Combinator. Inside the combinator, create five 14:2 mixers all in succession so that they are all chained one after the other.
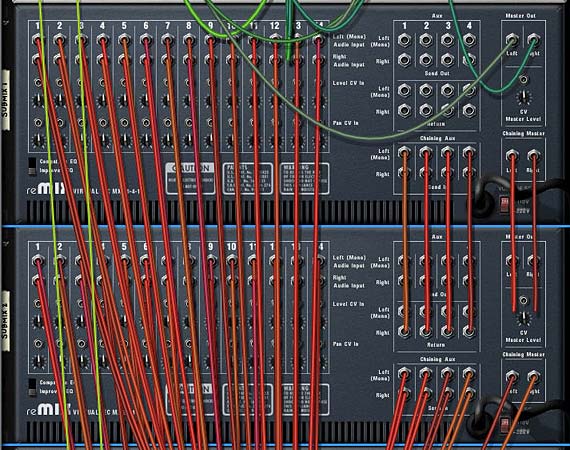
The five 14:2 Mixers are chained together. - Create 61 Synths. Yes, that’s right. 61 Synths. These can be any combination of Thors, Malstroms, or Subtractors. one trick before you go nuts copying and pasting is to create one instance of Thor, one Subtractor, and one Malstrom, and then initialize all 3. This way, only one oscillator or graintable is used and it will be light on the CPU. Once you’ve done that, copy and paste so you have 61 different synths and connect them each to their own mixer channel.
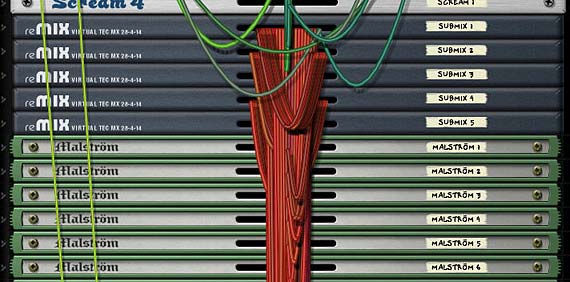
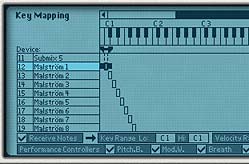
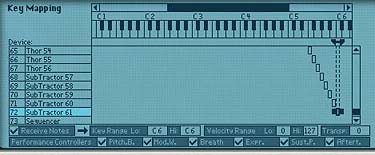
Each of the synths are connected to their own Mixer channel. - Now this is the trickiest part of the whole tutorial. Click the “Show programmer” button on the front of the Combinator, and select the first synth in the list at the top. Notice in the Key Mapping area on the left part of the Combinator screen, the key range for this synth spans the entire keyboard range. If you look at the bottom of the Key Mapping area, the value under Key Range is C-2 (Lo) to G8 (Hi). We’re going to change these values so that both read C1. The easiest way to do this is to click and drag upward over the “Key Range Lo” field until it reads “C1.” Once you’ve done that, you can click and drag down all the way on the “Key Range Hi” field. This means that the synth will only be triggered by pressing C1 on your keyboard controller.
- Sweet! Now do this for each subsequent synth, but incrementing each one by one note value upward on the scale. So, for example, the next synth is only triggered by C#1 and the one following that by D1, and so on up the scale until you have the last synth in place at C6. Ta da! Now each synth can only be triggered and played from it’s corresponding note on the keyboard controller. And taken as a whole, the entire kit ranges the same 5-octave span of the Matrix (from C1 to C6).
- Now comes the really fun (but tedious) part. Go through each synth one at a time and sculpt your drum sounds. Go wild. Enter some amazing Kicks, Snares, Toms, Hi Hats, Rim shots, glitch mayhem, or whatever sounds you really enjoy listening to through Reason. Don’t be shy. Jump in and have some fun. And if you’re really hard pressed for some ideas, sift through the Factory Soundbank (FSB) for some inspiration. There are plenty of synth ideas in there.
- Add a Matrix under everything, flip the rack around, and tie the “Note/Gate CV out” cables from the back of thedevice into the Sequencer Control “Note/Gate CV in” on the Combinator. Flip back around to the front again and start dialing in some Note/Gate patterns into the Matrix pattern banks. Or use the right-click context menu to select some random patterns for the various Matrix pattern banks.
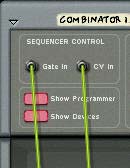
Connecting CV cables from the Matrix to the Combi's Sequencer Control section. - Finally, go back to the Combinator’s Modulation Routing section and with the Matrix device selected, enter the following settings:
Note: audition your sounds using your keyboard controller. This way you can hear each note triggering each synth. If you forget your place on the keyboard, minimize your entire stack of synths by holding down Alt as you press on the minimize arrow of one of the devices. This will automatically minimize all devices within the Combinator. Now press a key on your controller and look for the “Note On” light as you press. This “Note On” light will show you which synth is triggered by the note you are playing. Since each synth is tied to an individual note on the keyboard, only a single “Note On” light will flash when you press a single key. Trust me, this is a great time saver when working with so many devices.
Rotary 1 > Pattern Select: 0 / 31 (assuming you’ve entered patterns in all 32 pattern banks of the Matrix)
Button 1 > Pattern Enable: 0 / 1

Keeping Button 1 off means that you can play the Combinator in a “live” situation, accessing the drums to be played in real time and ignoring the Matrix. Turning on Button 1 automates the drums and plays the drums according to what is programmed in the Matrix. Spinning the Rotary 1 knob will select from the 32 Matrix pattern banks. You can also automate pattern changes for the Matrix in the Sequencer if you create a sequencer track for the Matrix.
I hope you’ve enjoyed this little exploration of what can be done with a bunch of synths and a Matrix inside a Combinator. You can create some gigantic kits using this technique. And it can be an alternative to using the NN-XT for a sample-based drum kit.
As with any method, there are pros and cons to this approach. I like it because it can be much easier to tweak the sounds later if you want to adjust any of the synth parameters for your various hits. Personally, I feel this can give you more flexibility than storing your kit in an NN-XT. That being said, the downside is that it’s not quite as compact, takes some time to load up in your song, and it’s not sample-based so it’s not as “organic” as samples in an NN-XT can be. Both approaches, however, are valid. It all depends what you’re after.
If you have any other ideas or unique ways in which you’ve created your own kits please share them with us. I’d love to know some new techniques that I may not have thought about before.
Until next time, I hope this inspires you to build some kick-ass drum kits. Good luck!
