It’s very easy to think of Kong as a “Drum” designer because of course that’s what it is called. And indeed that is its primary purpose. However, it would be a mistake to think of Kong as only a “drum” programmer. That’s like calling a Computer a “Word Processor” — sure that may have been the original intent, but it’s just so much more. Here I’ll show you a whole new side to Kong. This tutorial will use Kong as a mini Scene Selector, to imitate Ableton Live’s Session view and then also use it as an Effects selector for any audio you like. In this way, you can switch between clips (Rex Loops) and Scenes (groups of Rex files). We’ll also use one of Kong’s pads to cycle through as many FX as your processor can hold. Hours of fun.
To start, I’m going to use a Combinator I came up with which you can download here: OctoKong-Scene-Selector-3. It’s a single Combinator inside an rns file. The Kong inside the Combinator has been given its own track because I find it easier to play the Kong outside the Combinator and place all the midi data there, as opposed to sequencing midi data on the Combinator track.
A little Off Tangent: Recreating Ableton “Live” in Reason?
As an aside, I have to give a huge thanks to Dioxide for inspiring the idea behind this Combinator. He wanted to try to mimic Ableton Live’s Scene / Clip system. This comes pretty close and allows you to select between different clips in a mini 9-pad way. The pads along the right side trigger all the loops within their respective rows, while the pads on top cycle through that specific row’s Rex loops (8 loops in total). When you open it up, you’ll have to press the “Run Pattern Devices” button on the Combinator. This sets all the loops running freely. I’ve also set up the first 3 buttons on the Combinator to act as your “Mutes” — so you can mute any of the columns at any point in time. You can also play each loop individually by playing the other pads alone or in combination. In this way, it’s a mini scene/clip selector for Reason.
If you’re interested, here is a 2-part series on how to create that patch:
But moving on, the real focus of this article is that lonely little pad 16 up there in the top right corner. What to do with that little pad all empty and lonely. Let’s add a ton of effects and use the pad to cycle through each of those effects one after the other. Let’s load in as many as your CPU can handle!
Well, actually, let’s focus on the PROCESS to add in as many as your CPU can handle. I’ll give you the tools and know-how to add in a few effects, maybe 4 or 5, and then you can use the same technique to load up as many effects as you like. This way, you can take the FX Pad in any direction you like. Sound good? Ok. Let’s get started.
Adding 5 FX at once, and tying them to the Pad
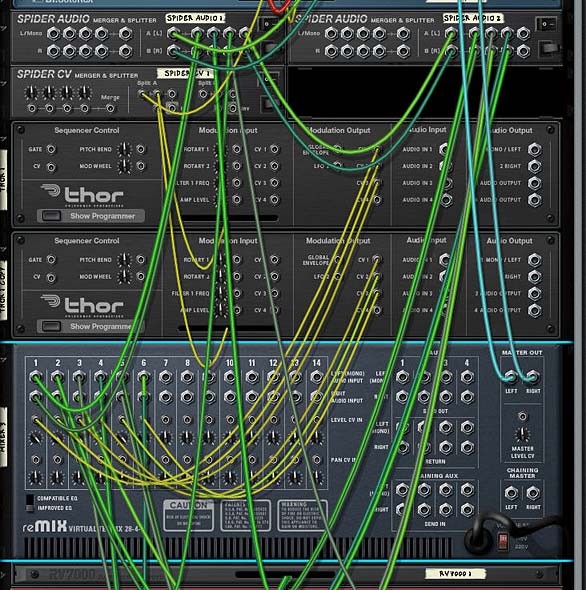
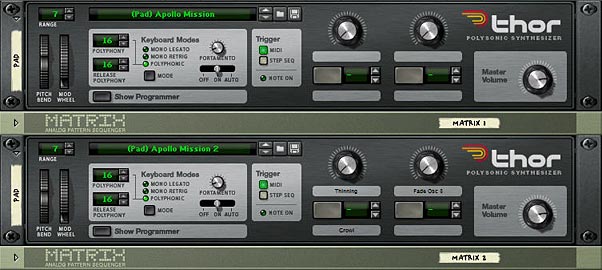
The basic idea is to send all the FX into a separate Mixer and then back out to the main output. All the levels of all the channels are turned off and CV is used to determine which channel gets heard. The first Channel is the original (untouched) audio without any FX applied. Then you have five different FX applied to the audio chain which goes through the different channels on the mixer. The CV is then sent out from the two Thors and turns up each respective channel to level 100 on the 14:2 Mixer. The Thor Step Sequencer is used to move step by step through the different FX, and the Pad (Pad 16 here) is the main catalyst moving the step sequencer forward.

In conclusion, pad 16 cycles through all 5 Effects devices. And the cool thing is you can create any number of devices inserted into the chain. So if you want to create custom FX devices, you can insert them into the chain in any way you like. You can also create more than just 5 tied to a single Pad in Kong. But I think this shows you a pretty good example of the possibilities. And that’s what I hope you take away from this.
So what do you think? Any other interesting ideas or uses for the new Reason 5 devices. Is it time for me to move on to Neptune? As always, comments here are welcome. And stay tuned for more to come. Good luck in all your Reason projects!

